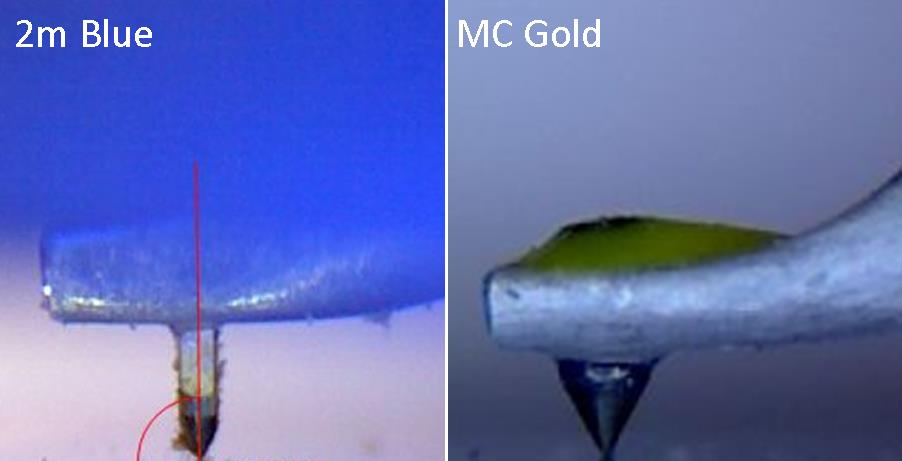
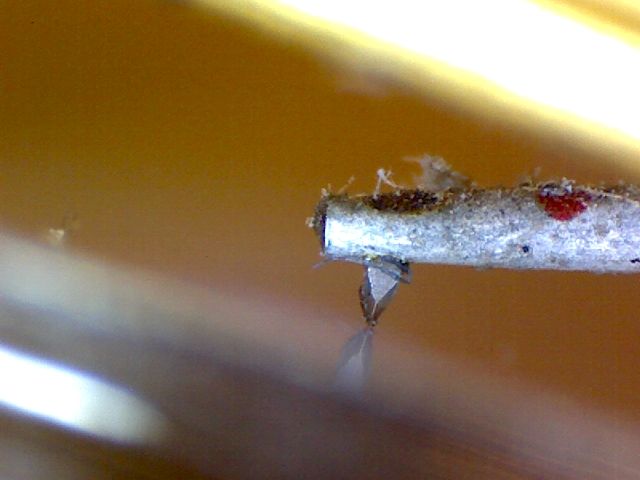
The three standard cartridges that come with Pro-Ject turntables, come fitted with ‘bonded diamonds’. That’s not a diamond stylus, it’s a steel stylus with a diamond chip bonded onto the tip that touches the record.
It’s easy to upgrade the sound of your turntable yourself. You just slide off the original stylus and slide on a solid diamond model (called nude diamond the catalogues) and instantly improve your treble clarity. Higher model nude diamonds relate to how smoothly they’re polished, and into what shape. The best stylus shapes contact the record groove in a thin line but they cost a lot more money.
Changing a stylus saves between $100 – $330 compared with purchasing a whole new cartridge.
OM vs. 2M?
The OM series and 2M series are much the same cartridge with different plastic mouldings. The cartridges have hardly changed in 30 years! OM became ‘SuperOM’ in the 1990s. when Ortofon discovered that coils wound on hollow pins sounded slightly better than solid pins. The ‘2M’ cartridges employed hollow pins and the plastic moulding was redesigned to replace the small OM brass weight with a larger stainless steel weight. Baby-steps. I wouldn’t bother replacing an OM body with a 2M body – the diamond stylus is what makes the biggest differences.
You can’t really over-spend on a stylus, since you’ve already paid for the turntable and cartridge body. With more money to spend – some high end cartridges do cost thousands, even tens of thousands – I’d revisit the turntable itself, but in their price categories, every Ortofon stylus represents excellent value for money.
Okay, I might be ‘unselling’ here. Still, it bugs me when I see devices that take your money and don’t add any value to the quality of your sound experience. Stylus lifters are one. I don’t believe that they are a worthwhile addition to any turntable. I’ll explain…
Folks see their stylus swishing around in the centre groove, and guess that they’re wasting hours of stylus life – click, click, click – but that’s not how stylus-wear works.
Music, pressed into your vinyl record, is like sandpaper to a stylus. The music is recorded in a jagged line that has between 20 and 20,000 ‘bumps’ per second. Soft sandpaper, mind you, it takes about 1000 hours of playing (average 36 million bumps) to wear a diamond stylus. The centre groove, in contrast, is relatively smooth. It has 33 1/3 bumps per minute –not even 1 per second! – so it has no lasting effect on stylus wear. Compared with 20-20kHz (let’s say an average of 10kHz), you could swish your stylus around a centre groove for 18,000 hours and do as much damage as 1 hour of playing music.
Stylus lifters and dust-bugs, record treatments… they’re more about add-on sales and money in the till than genuinely helpful devices.
Sorry if I curb your enthusiasm.
A better stylus, on the other hand (Ortofon 2Mblue, OM20, etc.), now that’s worthwhile… more about that later.
Customers ask, “Why do your speakers sound great, every time we come here?”
Of course you don’t need an anechoic chamber. Speaker position can minimise the detrimental effects of your listening room.
Well, of course it starts with great speakers but, after that, “great” sound is all about speaker position. “Position, position, position.” Where I place speakers within a room has a considerable bearing on the sound of a system.
Music – sound – transmits through air, and a listening room encapsulates that air. Speakers act with simple hydraulics: they literally pump air into and out of your ears as the cones push out and in. That’s particularly true for deep bass, but as frequency gets higher and higher, the pump-action gets smaller and smaller. Above 80 hertz – actually, most of the audible range – speakers behave like radio dishes and beam sound toward your ears. And, then, above 3,000 hertz, they change character again to act like floodlights that bathe a room in treble.
It makes sense that, if you position speakers carefully in your listening room and tilt them toward you ‘just so’, you can fine-tune them to deliver their best performance. It’s what I try and do with every system here.
Speakers as an afterthought
Speakers suffer an horrible stigma with fashion police. Apparently, “they’re ugly.”
Well, hopefully, you addressed that dilemma when you purchased yours. There are all kinds of ways you can make a speaker compliment your decor, not quarrel with it. And that’s important because when they’re tuned-in properly, and you’re loving every minute you play music or movies through them, your speakers are going to be a treasured feature of your living room. So often, folks choose their speakers after all the other furniture has been bought and arranged. Too often, speakers are specifically selected to hide into decor whilst large pieces of furniture – coffee tables for instance (all they do is hold your drink!) – sit pride-of-place, as if they’re of some great importance.
My approach positions the speakers first and then fits furniture around them to suit your aesthetic appetite. I’m not always popular with fashion police. Well that’s not completely true, we get there in the end. But it’s important to accept that you’re going to see a pair of speakers in the end, and that you’re going to need to to move other furniture to accommodate them; simple as that.
Speaker position around bass modes
The first thing I try to get right is bass. It determines the speaker’s distance from back and side walls. When speakers pressurize a room, sound reflects between all four walls, and forms bands of boomy bass. We want to avoid those bands.
I begin with no spikes in a speaker in the corner of the room. It needs to slide easily so I might slip cardboard or carpet underneath to help.
I mark the points of an equal-sided triangle with the sofa with masking tape.
Measure the sofa -to-the-hi-fi-system distance and mark with a dot of tape
Then I measure half that distance out to the left and right and mark those points with tape too.
I have 3 dots at roughly even spacing (it’s 15% off equilateral, but that’s okay). The 2 outside dots are my speaker positioning targets.
Then I play a track with even, repetitive bass. I use “Jennifer Warnes — Ballad of the Runaway Horse” https://youtu.be/5BD7CFwiIsI on repeat.
I stand in front of one speaker box and listen to the bass boom from above the speaker. It will be slightly louder on the wall-side than the adjacent side. Slide the speaker away from the corner and the ‘louder’ boom will switch to the adjacent side. Slide the speaker slightly further again and the boom will drop in intensity. That’s the first ‘null’ point.
If the first null point is close to my target dot, I stop there. If not, I repeat the process, sliding still further along, to find the second null point.
I repeat the process with the other speaker, sliding out from its corner to locate the null point closest to the target.
Then I locate the null-points from the back wall.
Listen from the side of the speaker, this time, head above the cabinet. The boom will be clearly louder behind the speaker than in front.
Slide the speaker forward and the boom switches to the front of the box.
Slide the speaker slightly further until the boom drops in loudness and that’s the first null point.
If the first null point is close to my target dot, I stop there. If not, I slide further along to the 2nd null point.
I finish up this stage with a pair of speakers, somewhat near my target tape parallel to the back wall. I measure the coordinates and remove the sliders.
Position the sofa
Next, I want to center the sofa. It’s easy with the speakers parallel to the back wall. I sit on the sofa, or chair, at a point between the speakers and look at the speaker cabinets. I move around until I can see exactly the same view of the in-facing walls of the speakers to determine whether the couch needs to move left-or-right by an inch or 2.
Then I listen to the bass guitar track again and, ignoring the vocal, I move back-and-forth in the seat until I find a point where the bass is at its clearest. Again it will be within a foot of the original seating position.
The toe-in
So I’ve got the bass right. The treble kind of looks after itself. What I want to tune-in last is the midrange. Midrange ‘beams’ out from the driver. It’s loud right in front and soft to the sides. If you think of the shape of a midrange driver – between the dustcap and the cone, it’s a bit like a megaphone. It transmits sound ‘straight out the front’. Jennifer Warnes’ voice, in ‘Ballad Of The Runaway Horse,’ is perfect for this test. I mark the inside, front, bottom corner of the speaker cabinet with a texta dot on masking tape so I can find it later. And I lay 10cm strips of masking tape beside the outside corners with six dots marked at 1cm intervals on each.
I play ‘Ballad Of The Runaway Horse,’ and listen for the clarity. Jennifer Warnes’ voice is, more or less, polyphonic. She has a clear head-voice, throat and chest-voice. With speakers set parallel to the back wall, I should hear a clear head-voice but little throat or chest. I move both speakers’ outside corners to the first dot and listen for differences. Throatiness will be more present as she forms each word. Second dot in is usually better than the first and third dot, better again – the mid-range opens up and a deeper chesty, breathy quality to Jennifer Warnes’ voice becomes apparent. I know I’ve gone too far – fourth-to-sixth dot – when the sound closes-in and the voice stops ‘singing’ and starts ‘shouting’. Too far sounds like she’s cupped her hands to her mouth. I set the two speakers back to the dot that sounds best.
Tilt
So speakers are spaced from the walls and toed in. The last axis to adjust is ’tilt’. Spikes allow you to tilt a speaker to better align the midrange driver and timing between all two or three drivers. I use found objects – CD covers and such – to mock-up a tilt angle. I play a favourite track (I’ll have had enough Jennifer Warnes by now) and get my son to slowly tilt one speaker back, hinging the rear bottom edge of the cabinet against the floor. If the sound ‘opens-up’, I want to work out how much I need to raise the front edge of the speaker. I add CD cases, brochures, business cards, etc., one at a time, to the front bottom edge to mock-up the best sounding tilt. What I have at this stage should be sounding pretty good.
And lock it in
Finalise the speaker position by marking the perimeter of the speaker, on the floor, in masking tape. Then I assemble enough washers to equal the thickness of my cases, cards, etc. and screw the spikes into place, using the washers as spacers on the front spikes. Always use the spikes, if you have them. If the floors are timber or tiles, I use little pads that usually come with the speakers or five cent pieces to protect the floor. The spikes are ‘right’ when there is no rocking between any two diagonally opposite spikes. When all four spikes are sure-footed, tighten the locking nuts using a spanner, shifter or pliers. With the speakers positioned back within their masking-tape ‘chalk lines’, I completely remove all the masking tape for a clean look.
Enjoy…
What I should have now, is music where each instrument sounds clear and takes on its own ‘voice.’ Each instrument sounds like it’s coming from its own location within a soundscape ‘conjured’ by the two speakers. Bass is clear, tight, fast and integrated perfectly with the midrange. The overall effect should be thoroughly entertaining.
I have more tips for centre and rear speakers for surround sound, but that’s a whole other essay.
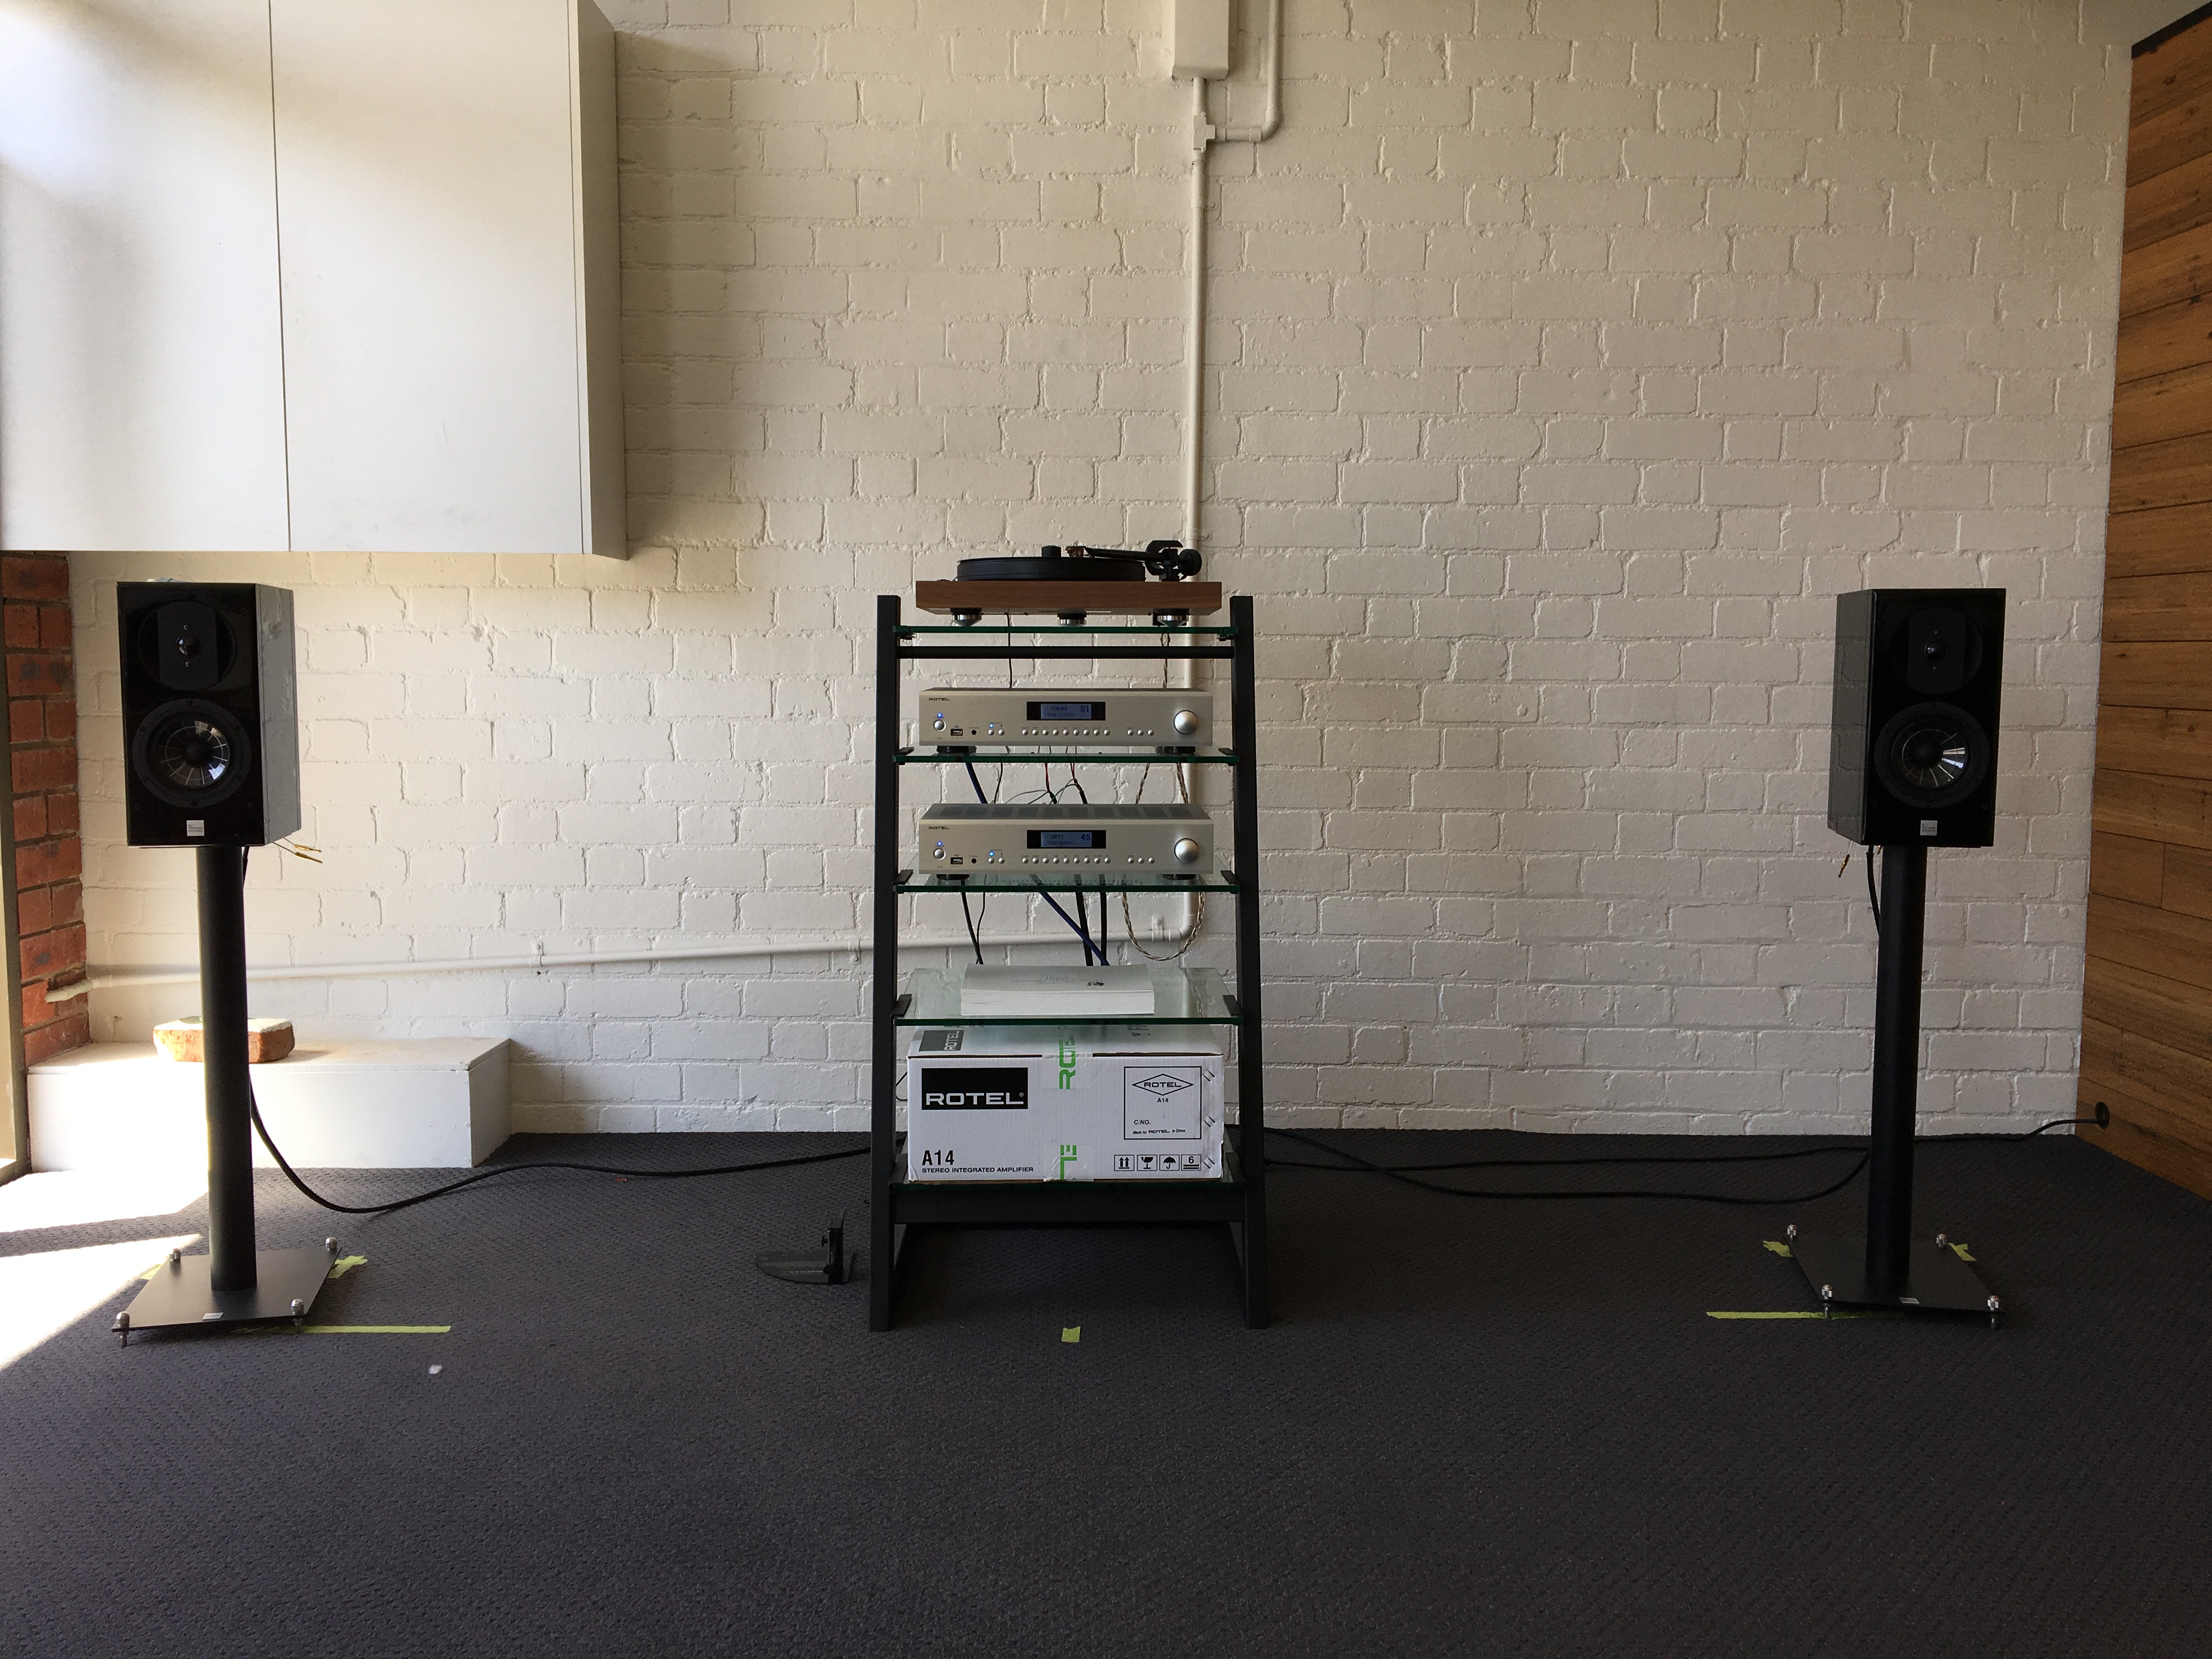
It’s time to get a better turntable than your kids!
I set up a Pro-Ject ‘The Classic’ turntable for a customer today and I need to share. I fitted an Ortofon 2M-Silver cartridge – a discontinued model that’s a steal right now – and made all the right adjustments. The result is sensational. I’ll try and describe it in a minute.
‘The Classic is a magnificent turntable. Its plinth, veneered in walnut or eucalyptus, houses the motor and connections and sits on three adjustable aluminium and elastomer feet. Whilst elastomer feet divides speaker vibration from the plinth and six more elastomer balls isolate a detached top-plate. Therefore the whole record-playing rig is effectively isolated from speaker and motor vibrations. The two-part platter weighs 3 kilograms(!) and consists of a large aluminium flywheel that has a thick ribbon of elastomer set into a channel around its periphery, and a hard plastic sub-platter which connects to the motor via a flat rubber bent. A brand-new tonearm design employs aluminium and carbon fiber – two materials that support each other – and is damped with even more of this special energy-dissipating TPE elastomer.
Pro-Ject The Classic with Ortofon 2M Silver Turntable Sounds Marvellous
It’s a kind of plastic, this TPE elastomer.
Famous Danish cartridge manufacturer, Ortofon, invented the long-lasting suspension material for their phono cartridges. Rubber changes over time, but TPE plastic lasts indefinitely. It has a spongy, gel-like texture that presses against surfaces to absorb and lose energy. Energy, in saturation, causes vibration which your cartridge picks up with the music when you play records. It makes sense to eradicate as much unproductive energy as possible throughout a whole turntable design. The effect of TPE is like touching your finger to a ringing bell; it blocks ringing instantly. Pro-Ject uses TPE judiciously in low-cost models but, in ‘The Classic,’ just about every component is in contact with the clever elastomer.
So, how does it sound?
In a word, it ‘sounds’ like nothing at all. ‘The Classic’ has little of its own ‘sonic signature’. I played Cyndee Peters’ 1977 album, “Black Is The Colour,” on Opus3 records. Each instrument has its own distinct tonal quality: bells and cymbals sound metallic, hand-drums sound ‘wooden,’ Cyndee’s vocal sounds clear and I can hear her breathing and vibrato and the ambiance of the studio. ‘The Classic’ turntable renders each of these sounds so that they’re easily discerned and come together with the feel of a live performance.
The Classic’s bass is solid and punchy. Much more expensive models offer a better sense of bass clarity and tune but, ‘The Classic’ still shows me what and how the bass guitar is playing.
Piano sounds exceptional! The title track of Cyndee Peters’ “Black Is The Colour” is a stripped piano score with vocal. Piano needs stable speed to sound credible. It’s one of the key features of CD players when they first emerged: pianos sounded ‘right’ compared with most old turntable designs. Well ‘The Classic’ renders piano beautifully. A solid, tuneful performance where each note, it’s overtones and the hall ambiance combine with the effect that it really does sound like ‘a piano’!
I’m very happy with this deck!
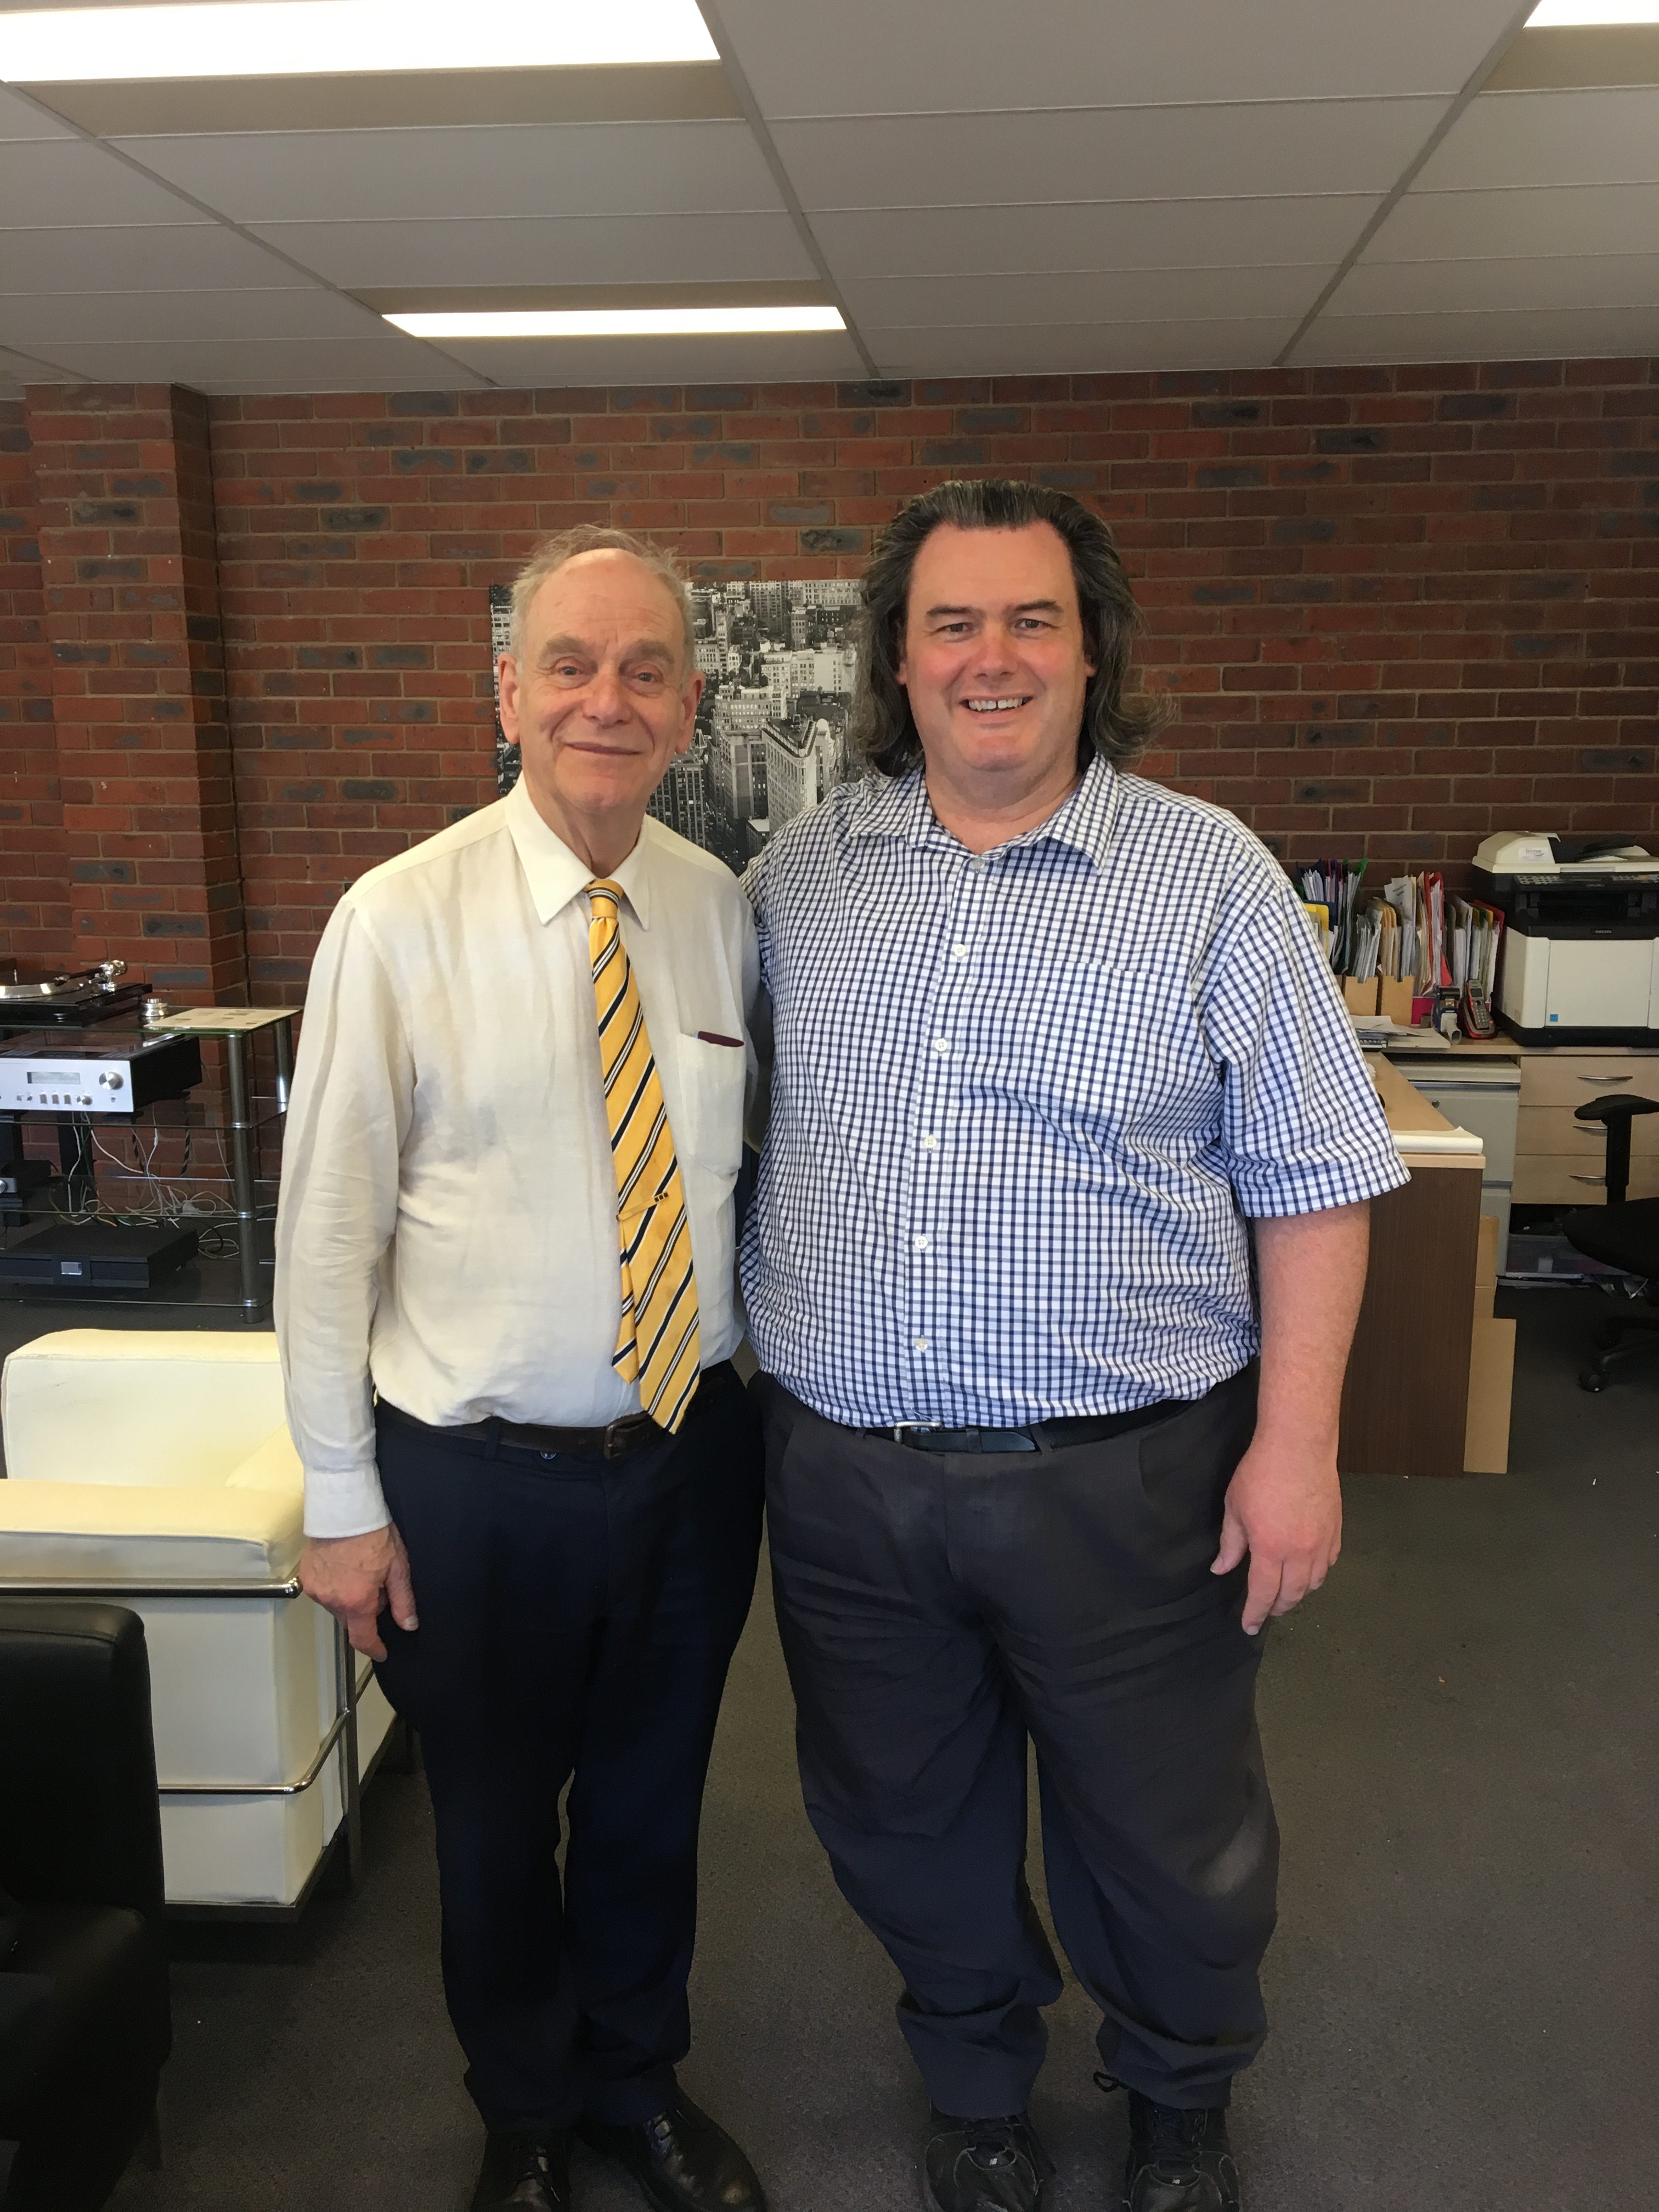
My customer and his brother called in to collect his new turntable. I spun him and his brother two Cyndee Peters tracks, “House Of The Rising Sun” and “Noah’s Dove,” and he immediately understood what I’ve told him about this turntable, and been writing about here. His brother was even impressed. This is a thirty-year-old record with little scratches here and there! None of them got in the way of the music. He was so excited to get it home and spend his first weekend with it, and who wouldn’t be. It’s perfect weather for hi-fi! Sadly, in no time at all, this Pro-Ject ‘The Classic’ was all packed up and gone. Too soon if you ask me. I think I’d like to, let’s just say, ‘test it some more’. I have so many more albums I’d like to ‘examine.’
Matt & Ken Bennett Listen and Learn Together at Steve Bennett Hi-Fi
But wait there’s more. Here’s the deal:
I’ve got two more coming. So taken was I with the Pro-Ject ‘The Classic’ that I ordered more. And I couldn’t choose between walnut or eucalyptus so I’ve ordered both. ‘The Classic’ also comes in Rosenut – a red-stained walnut veneer. Order one from Steve Bennett Hi-Fi and I will ‘fit‘ an Ortofon 2M Silver cartridge at no extra carge. ‘The Classic’ is one of the cheapest turntables that you can adjust every aspect of cartridge alignment. So, when I say ‘fit‘ a 2M Silver, I will set the overhang and zenith with Dr. Fieckert ‘Protractor NG,’ I’ll adjust the stylus rake angle (SRA) to 92 degrees with my USB microscope, and I will set the azimuth with Dr. Fieckert’s ‘Adjust Plus’ computer program. You’ll get a superb turntable with an affordable replacement stylus that tracks beautifully.
The Ortofon 2M Silver.
Ortofon manufactures the 2M Silver especially for Pro-Ject. It combines the bonded stylus of a 2M Red with the body of a 2M Bronze and 2M Black. The high-quality body uses silver-coated copper coils instead of the standard copper. Silver is a superior conductor material than copper. “The skin effect’ is a well known phenomenon in which high-frequencies are much more interested in a wire surface than its cross-section. Common sense supposes that the 2M Silver body has better treble than the standard 2M Red body. But that’s not all! A.J. Van den Hul explained that copper degrades over time due to impurities. Impurities come from exposure to oxygen, most obviously, but also exposure to other chemicals in a wire’s coating. Silver provides a superb, benign coating for copper that preserves its high purity from exposure to the elements. A.J. said that “whenever you hear harshness or graininess in the music, that’s copper impurity – somewhere – in the system.
Upgrades
You can easily upgrade to an Ortofon 2M Bronze with nude fine-line diamond or 2M Black with nude ‘Shibata’ profile diamond. Simply purchase a replacement stylus at a fraction of the cost of a whole new cartridge. Since you already have the base, it’s a good value upgrade. 2M Silver will eventually be replaced by the new silver-coiled ‘Pick It 25A‘ – but the 2M styli won’t fit.
Steve Bennett was a natural-born gadget man. He bought a pair of Philips full-range speaker cones in 1972 and connected them to his amplifier. With no cabinets yet, he fitted them back in their cardboard boxes and then sat back to enjoy glorious stereo. The sound was awful! No bass! He poked holes in the cardboard boxes to ‘let the bass out’, and he was shocked. There was even less bass than before. Right then and there, at 22 years old, Steve Bennett got into hi-fi.
Steve researched how electronics and speakers worked – it turns out cabinets were essential after all! Value-for-money speakers of the early 1970s were kits. You bought a pack of woofers, squawkers(!) and tweeters and fitted them to your own wood-work. Steve built many kits – Philips, Goodmans and Tannoy – for friends and workmates at the Geelong Ford factory. He began Steve Bennett Audio Sales in 1975 in the lounge room of our family home in Grovedale.
Steve Bennett Audio Sales
He quickly outgrew the lounge room. Steve Bennett Audio Sales ‘went legit’ with an after-hours and weekend store in Heyers Road Grovedale. A short time later, Steve ‘came to town’ upstairs at 53 Little Ryrie Street, Geelong. In 1977 he won the Yamaha account to open his first high profile shop in Ryrie Street. Mainstream hi-fi of the day – usually 2 speakers flanking a rack of gear – filled most of the store. Steve’s emphasis, however, was always on separate components rather than the more common 3-in-1 systems. But Steve’s real interest was in speakers. Acoustic Research or Yamaha speakers would be set on steel stands in a triangle with a couch and wired to the best Yamaha electronics he had.
All that changed in 1979, when a travelling salesman brought a Scottish ‘Linn’ turntable into the shop. First impressions count, and Steve was surprised that the salesman iconnected this expensive turntable to a cheap, popular, separate component system. Connected to the Linn, Steve’s little Pioneer Rondo 3000 sounded incredible! Sound leapt from speakers in a musical ‘other-worldly’ sound-stage. It was unlike anything he had heard. Of course, it sounded even better on expensive electronics but the idea, that bigger was not always better, changed Steve Bennett Audio Sales. Going forward, Steve’s priority was ‘sound-quality first’. If he sold equipment that sounded genuinely satisfying, the customer would be thrilled with the result for years! Better and more expensive products were available but it became crucial that everything in stock would produce a pleasing sound. Steve was committed to quality. He never sold anything he wouldn’t buy himself.
Steve Bennett Audio
Yamaha made some of the best hi-fi equipment in the world in the 1980s. Steve rode a crest of the high-end audio wave. Industry focus, by then, was on the listener experience and Steve needed more space for listening rooms – ‘sound lounges’. Steve expanded with two sound lounges, first upstairs; then another next door; then a local vinyl record and electronics store, ‘Sound Spectrum’; and then a specialist shop, with seven sound lounges, in Geelong West. Shannon Sound sold audiophile stereo equipment with Linn and Sota turntables, British CD players and amplifiers and Martin Logan electrostatic speakers. Sound Spectrum, with JVC VHS and Pioneer Laser Disc, saw Steve right at the dawn of ‘home theater’. By 1985 there were four locations around Geelong folks could hear and buy great sound. But, with expansion comes high costs, duplication and waste. And, run off his feet, in 1987, Steve consolidated the four stores into one: Steve Bennett Audio (he dropped the ‘Sales), and a small outlet store, ‘The Electronics Market’ to clear overstocks and used equipment.
And that’s when I started, in earnest: 1987. I’m Ken, by the way, Steve’s son.
I worked with dad since I was a kid. We didn’t play footy – we played records. Together, we set up Linn turntables in the family dining room, we swapped out tweeters and wires and listened to differences – all kinds of equipment – always at home – usually on a Saturday afternoon. I’ve worked in dad’s shops, on Friday nights and Saturday mornings, ever since I can remember. I loved the store-culture, its colorful characters and, of course, the equipment that brought me pleasure and happiness.
In 1987 I took a year off school to mind Shannon Sound and The Electronics Market full time. I pieced together the best sounds I could with cheap and used equipment to produce real hi-fi on a budget. And, at Shannon Sound, I adjusted very expensive turntables and speakers to sound as good as they could for discerning clientele. Always: I sought better sound than any given budget allowed. My approach is no different today.
Steve Bennett Hi-Fi
In 1991 we moved to a modern building opposite a juggernaut hi-fi chain. And, in 1994, the juggernaut shut shop and drove back to Melbourne. Steve Bennett Hi-Fi (I prompted the name-change. I hated answering the phone, “Steve Bennett-Tawdio”) moved to huge premises also in Ryrie Street – just down the road from the picture theater. Television and hi-fi had wholly merged and the new Steve Bennett Hi-Fi had nine listening rooms, seven of them dedicated to home theater. Yamaha, literal inventors of domestic surround sound, were at the forefront of the technology. And TV size came into focus. Of course, you could watch ‘M*A*S*H’ on a big TV – and it was okay – but you needed the biggest and best quality TV you could afford to enjoy Hollywood movies and Hi-Fi video tape in the room full of sound that modern hi-fi home theater could provide. Watching film on a big screen – albeit thirty-two-inch(!) was more than okay, it was an absolute necessity.
Steve Bennett Hi-Fi & Home Cinema
In 1995, Steve installed our first video projector: a 3-gun Seleco CRT from Italy which retailed for $$20,000 installed! Steve Bennett Hi-Fi’s step into real home cinema was complete, and our gigantic eighty-four-inch (4:3!) screen played laser discs of True Lies, Aladdin and The Mask on almost constant rotation in a dedicated theater complete with the same wool-drape curtains that wrapped the brand-new Village 11 theaters! TVs got bigger (I remember a thirty-seven-inch weighing 90 kilos!) and projectors got smaller. Point-and-shoot projectors, from Sharp, assembled eighty-four-inch pictures from red, green and blue dots for about the price of a twenty-eight-inch TV so, for around $6,000, you could partner a proper theater sized image with proper theater sound. But, with the projector switched off, a decent stereo system remained for music. That’s still the blueprint for home theater at Steve Bennett Hi-Fi. All our home cinema systems begin with an excellent hi-fi system, and the extra speakers and picture paraphernalia simply added on.
A Disappearing Act
The Noughties saw TV and home cinema come of age. Gigantic rear projection TV cabinets became standard fare in living rooms everywhere. A ‘hi-fi’ system could take up a whole wall! A trend emerged where some customers even built TV systems into their wall. A $500 box could make your remote controls work behind cupboard doors. $5,000 bought a programmed touch-screen that could operate your whole system for you. For $20,000 you could buy a fifty-inch Plasma and literally hang it on a wall! DVD replaced laser-disc with a technology that eventually replaced the VCR, laser disc, tapes, records and compact disc players. Giant racks of equipment made way for systems of just two or three components. Speakers disappeared to be cut directly into ceilings. Steve Bennett Hi-Fi could make a whole system disappear into cupboards and walls for minimal clutter. The perfect home had a gigantic TV with a touch-screen and a sound system you couldn’t see. Stitched seamlessly into a modern lifestyle, over time, music and movies somewhat quieted. What was once special event viewing had become everyday life.
Steve Bennett Hi-Fi – Next Gen
Sadly, we lost Steve in 2008. I figured that, what he’d started – I’ll ‘one-up’ that in his absence – what we’d started, was essential to Geelong. I’d keep the name in homage to my dad. Besides, I thought, I was as much a part of what ‘Steve Bennett Hi-Fi’ had become as Steve.
I closed Ryrie Street in 2010. Mum retired and I took the business to Pakington Street where rent was cheap, and parking spaces were plentiful.
I took on the best-sounding brands we’ve ever stocked, Vienna Acoustics and Paradigm speakers, Luxman amplifiers and turntables and Van den Hul hand-made moving-coil cartridges. And, at the same time, Yamaha galvanized their commitment to high-end audio with a range of two-channel amplifiers and CD players and upped the emphasis on music in their home theater products. They call it their ‘Aventage’ series. I still sell all of those products on a regular basis.
In 2015, after successive rent rises and my glorious wasteland of car-parks all filled up with folks at Pakington Street’s cafes and coffee houses, I hunted out another hi-fi haven with cheap rent and ample car-parking. 52 Little Ryrie Street is Steve Bennett Hi-Fi’s tenth home (!).
Now, my son Matt has become increasingly interested in record collecting (clearly, it’s in his blood) and hi-fi. While it’s all but disappeared in modern decor, music-lovers seeking out excellent hi-fi equipment – sound that enthralls, excites and relaxes all at once – are still thick on the ground.
In forty-three years, we’ve stayed true to our origins: we’re still trying to get more sound out of boxes. We’re still milking better sound out of any price range in our sights. And we’re father-and-son still listening to records together and ‘playing with hi-fi’ on a Saturday afternoon (when we should be playing sport).
Harry Anderson, Shane Anderson, Mark Barends, Doreen Bennett, Helen Bennett, Ken Bennett, Laurie Bennett, Matt Bennett, Steve Bennett, Ian Bowler, Justin Brearley, Richard Carter, Richard Course, Clayton Coverdale, Caleb Danks, Bob Fisher, Paddy Green, Carlo DiMartino, Tony Marruso, Richard Engel, Darren Fields, Johnny Friday, Eddie Kuyper, David Lewis, Frank Lynch, Greg McLean, Bruce McRae, Rob Miller, Dahl Murphy, Liz Murphy, Mark Parry, Denis Parsons, Jacob Pettman, Jason Pilcher, Paul Pronczac, Peter Quick, Glenn Reader and his brother Domnic, Michelle Reed, Rocky Richens, Paul Spierings, Craig Stillman, Daniel Sweeney, John Thompson, Jared Walley, Arthur Wight, Ian Winter, [that nice old guy with the orchids, what was his name?], [Dianne in the office]
Listen to music on a real hi-fi system. You’ll feel an emotional response; one that’s right up there with the best times you’ve had listening to music. Real hi-fi evokes memories of a concert you once enjoyed, or an instrument you play, or a great night with friends. Real hi-fi transports you, via imagination, to a jazz-club, concert-hall or a stadium.
So, how’s it different? Every time we hear music played on real hi-fi, we fondly nod to those memories. We subconsciously seek clues from our speakers that trigger an emotional response. That’s the same feeling we get listening to live music.
Without an emotional response, music might as well be playing on a kitchen radio. Real hi-fi doesn’t sound like kitchen radio, or a Bluetooth speaker, a 3-in-1 system or car sound. If we enjoy music, predicated on how many ‘details’ our sound system gets ‘right’, Real hi-fi delivers enough clues that our mind can construct a lifelike performance. The best hi-fi systems seem to leave little to the imagination. Sometimes real hi-fi sounds completely, well, real.
Apples Is Apples
Here’s an analogy that I think explains how the effect works. Imagine, for a moment, that you’re looking at a painting. Let’s say it’s a painting of an apple. With enough ‘appley’ details captured on the canvas – realistic colors, texture of apple skin, shape and shadows – in our mind’s eye, the painting looks realistic. It feels as if we could reach in and touch the apple. The shape could be distorted and the color perfect, and we can still recognize a realistic apple. We recollect a pleasant morning at home with sun steaming into the kitchen. It triggers an emotional response. Just a few really plausible, accurate details, and a suggestion of the rest, is all we need for to conjure a response in our mind. If enough details are represented accurately, then those blobs of apple-colored paint uncannily remind us of reality. In our mind’s eye, we see a photo-realistic apple that we could reach in and touch. Enjoying music on a real high fidelity system is something like that.
From The Studio to Hi-Fi
In the recording process, sound waves from each instrument are captured individually in the studio. They are converted into an electrical signal, mixed together into music, stored, amplified and then split into oddly disparate sounds radiating from woofers, mid-range speakers and tweeters – none of them sound anything like the actual sound wave that emanated from the singer’s mouth or piano’s soundboard. Yet our brain – amazing device that it is – stitches the incongruent chorus of sounds together and we recognize it, “yeah, that sounds exactly like a human voice,” or “that piano sounds completely real.”
At its most basic level, hi-fi systems must render just a few elements perfectly to its listener. It might be volume or the clarity of a kick-drum’s bass; or ambiance that was captured in the studio that gives you, the listener, all the clues you need to imagine exactly how and what a favourite musician is playing.
A Performance In Hi-Fi
As hi-fi systems improve in ability. and cost, more-and-more instruments sound credible as, in our minds eye (ear?), we hear exactly what they are playing along with all the clues about their location in the sound-scape which, despite coming from just two speaker boxes, sounds three-dimensional; deep, wide and high. And the system performs beautifully on a wider variety of music. Instead of sounding exciting only when playing acoustic sets, like to jazz, or folk or chamber music, a better system might, as well as improving within those genres, also present rock and orchestral music with more palpable realism.
Real Hi-Fi For You
A system that plays loud when it needs to, and softly when it doesn’t, with each recorded instrument clearly defined in tone entertains our imagination exactly like a live performance does. We’re not ‘listening to a song’ anymore, and we’re listening to a collection of musicians – a band – an ensemble – a performance – and we’re entertained in the same way as when we hear live music. As you invest more – more money and more living room space – the effect is more palpable. It really sounds like performers are playing to you.
Real Hi-Fi – How’s It Different? This what real hi-fi does.
It transforms your records and digital tracks into to a live performance.
I am sad to read that the founding editor of The Abso!ute Sound magazine, Harry Pearson, has passed away at age 77. In his revolutionary journal-cum-magazine, ‘HP’ quite literally ‘wrote the book’ on how the experience of owning and listening to the best high fidelity equipment should be reported – a tradition that continues amongst the best audio critics to this day. For me, HP’s writing in the 1980s was the first to describe the experience of listening to these pieces of good quality hi-fi so articulately that I actually felt as if I, myself, had also heard the products that he was describing. In benchmarking unamplified live music – or “the absolute sound” – HP would base his reviews on how the sound of his famous reference system, resulting from the component in question, brought him closer (or farther away, as was sometimes the case) to a credible three-dimensional performance; occurring vicariously right before my listening chair. A hi-fi component’s ability to conjure music and the musicians’ performance became, quite rightly, the benchmarks against which product performance would be judged rather than ‘bass’, ‘midrange’ and ‘treble’. New phrases frequently adapted words like sound-staging, transparency, liquidity, and ideas like yin and yang, and musical notations like ppps and fffs into a connoisseurs’ language to describe the auditory experience. I can never, after all these years reading The Abso!ute Sound and similar texts, separate the experience that I expect from listening to good hi-fi from what Harry Pearson has led me to expect… a lifetime of entertainment. Thank you for everything HP. You will be missed. Ken Bennett
More and more: people realize that the majority of their music and radio is now streamed from the internet. Others are afraid of streaming services because they worry that they’ll use up their entire internet plan streaming music.
Well, in a moment, I’ll talk about how the maths works. You can check how much internet data you’re actually using when you stream music. And, I’m happy – and somewhat relieved – to report that it’s not very much at all!
Internet Chew Through
What you’ll want to know is, how much music can you stream per gigabyte of your monthly internet download?
To work that out, the first thing to understand is that streaming services deliver different data rates, in data known as kilo-bits-per-second or ‘kB/s’ (examples follow). Now, we purchase an internet download allowance from service providers in Gigabytes or ‘GB’s per month.
I’ve used hours to make things easy.
To convert kilobits per second to kilobits per hour, we multiply 1 kilobit per second x 60 seconds x 60 minutes: so that’s 3600 kilobits per hour.
Now, outside of streaming, no one reallt uses kilobits. Data usually happens and is measured in bytes. We buy our internet allowance in giga-bytes. There are 8 bits in a byte, so to convert kilobits to ‘kilobytes’ we divide our 3600 kilobits by 8 to get 450 kilobytes per hour.
There are 1 million bytes in a gigabyte, so to convert KB to GB we divide that further by 1,000,000. So 1kb/s = 0.00045GB/h.
And we simply multiply 0.00045GB/h by the kb/s rate of each internet streaming service.
In these examples I have also worked out how many hours of music we get from just every gigabyte of data:
So, there you have it. If you run out of internet data, it’s more likely to be Catch-Up-TV than how hard you’ve been hitting the internet radio and Spotify. Cut loose! With literally thousands of streamed services, you can listen to music from anywhere in the world with excellent quality and with virtual impunity…..
Your brand new television is factory-set to ‘buy me’ mode when you first get it home and tune it in. Contrast and color are intense and unnatural: everything looks a bit like a cartoon…
Thankfully this set-up method – drawn from the birth of color television – will see your Smart TV deliver enjoyable, comfortable picture quality.
The method:
Newsreaders usually make good test material because they’re usually filmed wearing dark clothes with the the best studio cameras and lighting.
1. Turn OFF all of the ‘auto’ or ‘smart’ settings for color, contrast, brightness and sharpness. Do what you have to to take your ‘smart TV’ back to 1976! 2. To begin, we want to develop the image’s shadows and highlights – all the grey-scale from white to light-grey and dark-grey to black. Contrast and brightness are, to a picture, like treble and bass controls for sound; they govern overall tone. To set them, we have to start with a black-and-white image. Turn the color setting as low as it goes. 3. Contrast adjusts the ‘white level’. You’ll notice that the factory settings show a lot of ‘pure white’ on the screen. I actual fact, most of what you see as ‘pure white’ on the screen should be light grey. Adjust the contrast setting (usually down) so that the screen’s only ‘pure white’ glints are catch lights in eyes and twinkles on chrome and salesmen’s teeth – everything else should be a shade of grey. In setting that correctly, you should now see the full range of light grey tones. 4. Similar to contrast, brightness adjusts the image’s ‘black level’. Fabric folds and pinstripes in jackets make good test subjects. Adjust the brightness control (usually up) so that details in shadows become visible. When the brightness is too high, the picture takes on a ‘milky’ look and you’ll need to adjust it lower. Another way to achieve a good result is to start high and turn down the brightness until the ‘milky look’ fades. You should see all of the shades from dark grey to black. It’s usually harder to settle on the right brightness setting so take you time. 5. Contrast and brightness affect each other, so double-check your contrast setting in case brightness setting has changed it and, if it does needs changing, double-check the brightness. 6. Next, we want to achieve the highest color setting from your television without causing blurriness. You see when colors ‘bleed’ into one another when the color is set too high. Using the skin of your own hand as a guide, increase the color until the on screen skin-tone begins to look realistic. If the color is high, skin tones will take on a glowing orange or pink look. If its way too high, edges between color blocks on the screen will look fuzzy.
And that’s it!
That’s how we adjusted TVs in the ‘70s & ‘80s. There are a few more features in your new TV to bring it into the new millennium!
7. ‘Sharpness’ is a crude edge enhancer. Your television increases ‘sharpness’ by outlining all the elements of your image with thin black and white lines. You can see it clearly on text where it looks like ghosting. Turn the sharpness setting down until no ‘outline’ or ‘ghost’ is visible – but the picture’s not blurry – usually close to the minimum setting. 8. If your television has a color temperature control, adjust it so that the image color looks sharp – and doesn’t fuzz or bleed – usually cool or natural. 9. If your TV has a ‘Tint’ control, you can adjust the cursor a few steps to the right or left until you achieve a picture with the least amount of color in it. Red and green tints neutralize each other when the tint is perfect so when the color level slightly drops, you have usually achieved a natural tint level. Simply adjust the color up a notch or 2 until it looks bright and clear again.
We’re looking for an image that looks like a photograph. It has an illusion of depth and believable natural color. It should be comfortable and relaxing to watch – and look a good deal better than the TV you originally unpacked…