Posted on Leave a comment

A 1970s guide to better television on your smart TV…

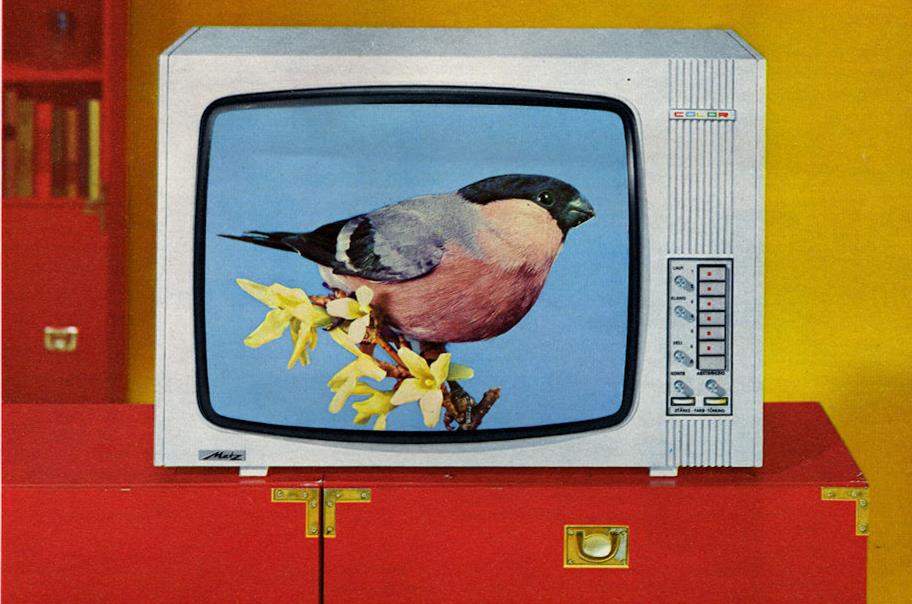
Your brand new television is factory-set to ‘buy me’ mode when you first get it home and tune it in. Contrast and color are intense and unnatural: everything looks a bit like a cartoon…

Thankfully this set-up method – drawn from the birth of color television – will see your Smart TV deliver enjoyable, comfortable picture quality.

The method:

Newsreaders usually make good test material because they’re usually filmed wearing dark clothes with the the best studio cameras and lighting.

1. Turn OFF all of the ‘auto’ or ‘smart’ settings for color, contrast, brightness and sharpness. Do what you have to to take your ‘smart TV’ back to 1976!
2. To begin, we want to develop the image’s shadows and highlights – all the grey-scale from white to light-grey and dark-grey to black. Contrast and brightness are, to a picture, like treble and bass controls for sound; they govern overall tone. To set them, we have to start with a black-and-white image. Turn the color setting as low as it goes.
3. Contrast adjusts the ‘white level’. You’ll notice that the factory settings show a lot of ‘pure white’ on the screen. I actual fact, most of what you see as ‘pure white’ on the screen should be light grey. Adjust the contrast setting (usually down) so that the screen’s only ‘pure white’ glints are catch lights in eyes and twinkles on chrome and salesmen’s teeth – everything else should be a shade of grey. In setting that correctly, you should now see the full range of light grey tones.
4. Similar to contrast, brightness adjusts the image’s ‘black level’. Fabric folds and pinstripes in jackets make good test subjects. Adjust the brightness control (usually up) so that details in shadows become visible. When the brightness is too high, the picture takes on a ‘milky’ look and you’ll need to adjust it lower. Another way to achieve a good result is to start high and turn down the brightness until the ‘milky look’ fades. You should see all of the shades from dark grey to black. It’s usually harder to settle on the right brightness setting so take you time.
5. Contrast and brightness affect each other, so double-check your contrast setting in case brightness setting has changed it and, if it does needs changing, double-check the brightness.
6. Next, we want to achieve the highest color setting from your television without causing blurriness. You see when colors ‘bleed’ into one another when the color is set too high. Using the skin of your own hand as a guide, increase the color until the on screen skin-tone begins to look realistic. If the color is high, skin tones will take on a glowing orange or pink look. If its way too high, edges between color blocks on the screen will look fuzzy.

And that’s it!

That’s how we adjusted TVs in the ‘70s & ‘80s. There are a few more features in your new TV to bring it into the new millennium!

7. ‘Sharpness’ is a crude edge enhancer. Your television increases ‘sharpness’ by outlining all the elements of your image with thin black and white lines. You can see it clearly on text where it looks like ghosting. Turn the sharpness setting down until no ‘outline’ or ‘ghost’ is visible – but the picture’s not blurry – usually close to the minimum setting.
8. If your television has a color temperature control, adjust it so that the image color looks sharp – and doesn’t fuzz or bleed – usually cool or natural.
9. If your TV has a ‘Tint’ control, you can adjust the cursor a few steps to the right or left until you achieve a picture with the least amount of color in it. Red and green tints neutralize each other when the tint is perfect so when the color level slightly drops, you have usually achieved a natural tint level. Simply adjust the color up a notch or 2 until it looks bright and clear again.

We’re looking for an image that looks like a photograph. It has an illusion of depth and believable natural color. It should be comfortable and relaxing to watch – and look a good deal better than the TV you originally unpacked…

Check out our ‘muses’ in the vision category here: https://sbhifi.com.au/?product_cat=vision

Posted on Leave a comment

RX-AS710: a ‘stereo amplifier’ for our times….

This article was originally written for Yamaha’s now defunct RX-V577… The advice still holds true so I’ve updated it to suit their new models.

2015’s market-wide obsession with digital music formats all but renders ‘traditional’ hi-fi amplifiers obsolete. No longer just for CDs and records: to be really useful in 2015, a hi-fi system must connect phones, computers and iPods, NAS drives and digital or streamed radio and internet services to your speakers… And then it needs to have connections for your TV and disc player – and a turntable, if you use one.

It is possible, but we have to think outside the box. Stay with me… It’s taken some 2015 thinking to bundle all of today’s solutions into a convenient, easy-to-use package. And the heart of that package – and it’s an obscure suggestion to today’s analogue obsessed audiophile – is, in fact, a ‘surround sound’ or AV receiver! We’ll use an $1199 Yamaha RX-AS710 as an example.

Music is recorded in stereo so it makes sense that it should sound best played back in its native format. 2-speaker stereo! And, whilst not their intended use, AV receivers can sound extraordinary playing digital music in stereo. They have 1 major advantage over stereo designs and that is that they have built into them, a Digital-to-Analogue-Converter (or DAC). At the heart of an RX-AS710 is a 24bit/192kHz DAC – like you might find in a $500 CD player – that can be fed signals from any device with a digital output: HDMI, optical Toslink, coaxial SPDIF or USB, Ethernet or wi-fi. A digital signal has no ‘sound quality’ – it’s a computer file – and it’s not until data from that file enters a DAC that transforms into audio. Every digital source produces the same proficient – and surprisingly good – sound quality because it’s being generated by the same surprisingly good 24bit DAC. Of course, low bit-rate streams don’t sound quite as good as high bitrate streams – but, still, they all sound very good. That’s the number one reason we recommend an AV receiver. It’s why we categorize our AV receivers as ‘digital source components’.

And, for the audiophile on a budget, there are more advantages for stereo listening: 7.1 AV receivers take advantage of speakers’ bi-wire terminals and use 4 internal amplifiers to independently drive tweeters and woofers resulting in more dynamic, more present sound and higher volume capacity with lower distortion from your speakers. And, if your speakers or room aren’t acoustically perfect, a sophisticated microphone system calibrates the sound fed into your speakers to eliminate any unattractive sonic signatures or colourations. Yamaha calls it YPAO and the benefits are obvious. When you switch YPAO on, you can hear more even tone, more fine detail, each instrument is reproduced with mo0re of its own sonic character – and when you switch YPAO off with the ‘pure direct’ button, the sound is reduced to the capabilities of those speakers in that room. In our demo room, the sound is ‘thinner’ and the bass is uneven and boomy.

Besides amplifier technologies, the Yamaha RX-AS710 (and higher model AV receivers) have built-in wi-fi, an AM/FM radio, an internet radio, soundbar-style connectivity (to take advantage of Bravia, Viera or Anynet ‘link’ technologies), they also have a DLNA media player that browses and plays music from any computer on your network anywhere in your home, they connect directly to Spotify and Pandora music servers for improved sound quality, they have a USB connection so they work just like a dock but they source Apple audio as a digital signal to bypass the ordinary iPod electronics. They operate from an easy-to-use app on your phone or tablet, or with your regular or a TV remote – whichever is most convenient for the user at the time.

Maybe best of all, unlike a conventional analogue system – an RX-AS710 doesn’t require an expensive CD player to play CDs – HDMI out of any make of BluRay player sounds just fine played through a 24bit/192kHz DAC – so you might have more money to spend on an even better receiver (with an even better DAC) or better speakers.

Sub $2,000 ‘traditional stereo’ components simply can’t keep up when they’re compared side-by-side with an AV receiver…

Post $2,000? There are more choices available. But I’ll save that for another post.